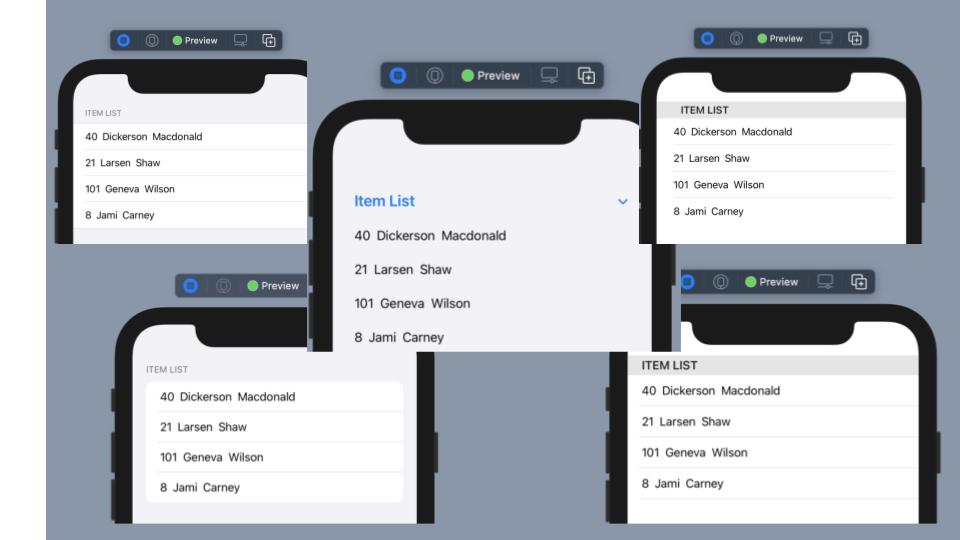
Xcode: 12.4, Swift: 5
SwiftUIのList ViewにはlistStyleモディファイアを使いListStyleを指定することで表示スタイルを選択することができますが、いつもの通り公式サイトにはあまり詳しい説明がなかったため、何を使うとどうなるのかをパット見で分かると便利かと思いましたので、ここに整理しておきます。
サンプルコード
年齢、名前からなるリストを以下のように作成しました。
import SwiftUI

struct ListStyles: View {
    var body: some View {
        List {
            Section(header: Text("Item List")) {
                ForEach(samplePeople, id: \.self) { people in
                    HStack {
                        Text(String(people.age))
                        Text(people.first_name)
                        Text(people.last_name)
                    }
                }
            }
        }
    }
}

struct People: Hashable {
    var age: Int
    var first_name: String
    var last_name: String
}

let samplePeople: [People] = [
    People(age: 40, first_name: "Dickerson", last_name: "Macdonald"),
    People(age: 21, first_name: "Larsen", last_name: "Shaw" ),
    People(age: 101, first_name: "Geneva", last_name: "Wilson" ),
    People(age: 8, first_name: "Jami", last_name: "Carney" )
]
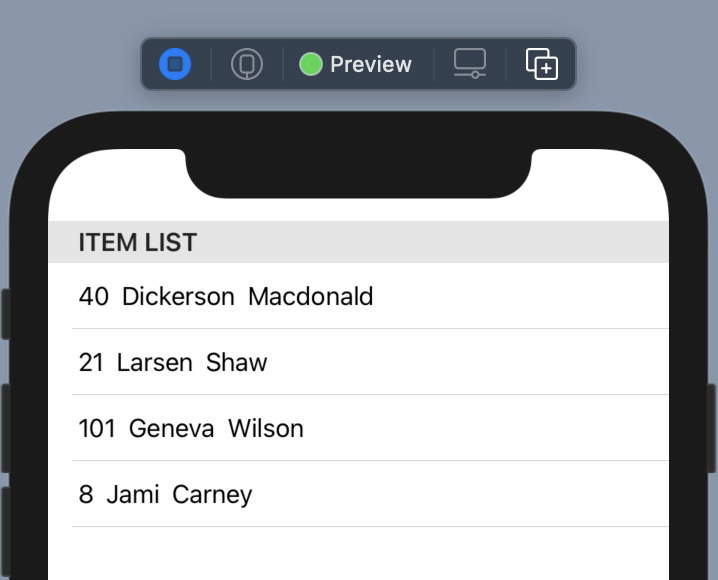
ListStyle指定なし

次に、ListStyleを指定していきます。
DefaultListStyle
以下のハイライト部分を追加することで、ListStyleの指定が可能になります。
struct ListStyles: View {
    var body: some View {
        List {
            Section(header: Text("Item List")) {
                ForEach(samplePeople, id: \.self) { people in
                    HStack {
                        Text(String(people.age))
                        Text(people.first_name)
                        Text(people.last_name)
                    }
                }
            }
        }
        .listStyle(DefaultListStyle())
    }
}
このスタイルはその名の通り、指定なしと同じですね。

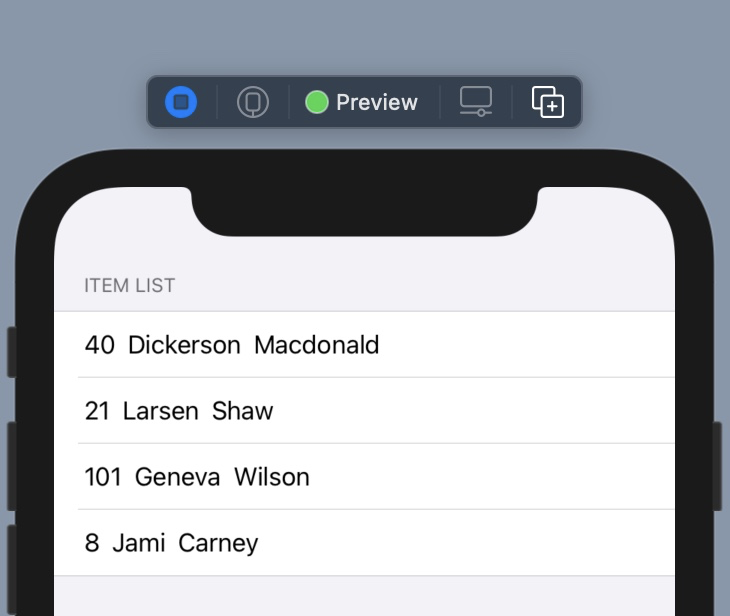
GroupedListStyle
DefaultListStyleに比べ、ヘッダや各行にゆとりが生まれるかたちになります。
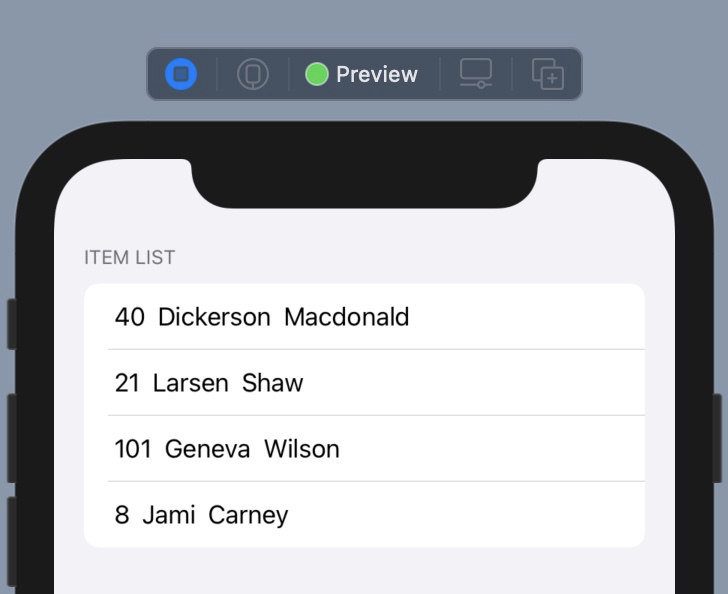
InsetGroupedListStyle
GroupedListStyleの状態で、更に左右に隙間が生まれるかたち
InsetListStyle
DefaultListStyleの状態で、更に左右に隙間が生まれるかたち
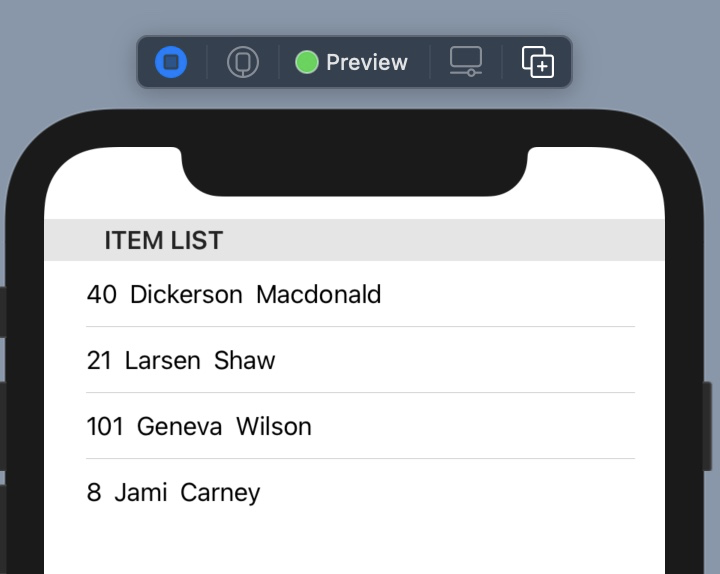
PlainListStyle
InsetListStyleに比べ、隙間が生まれるのが左側だけ
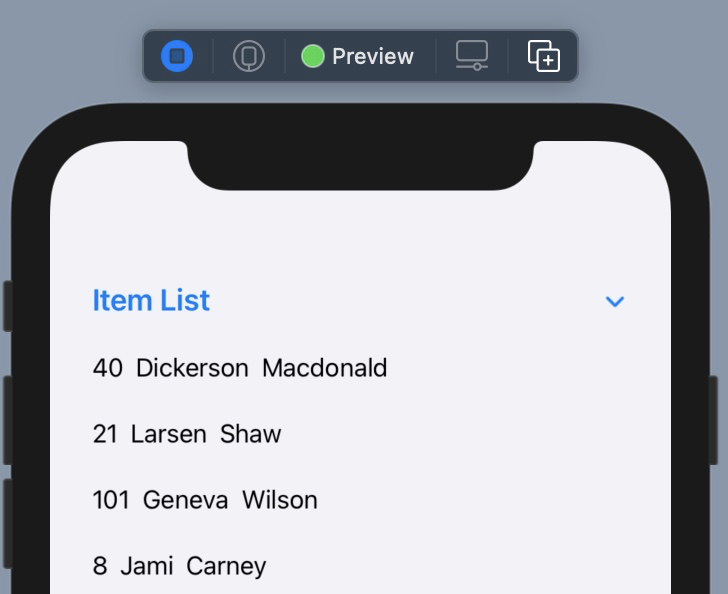
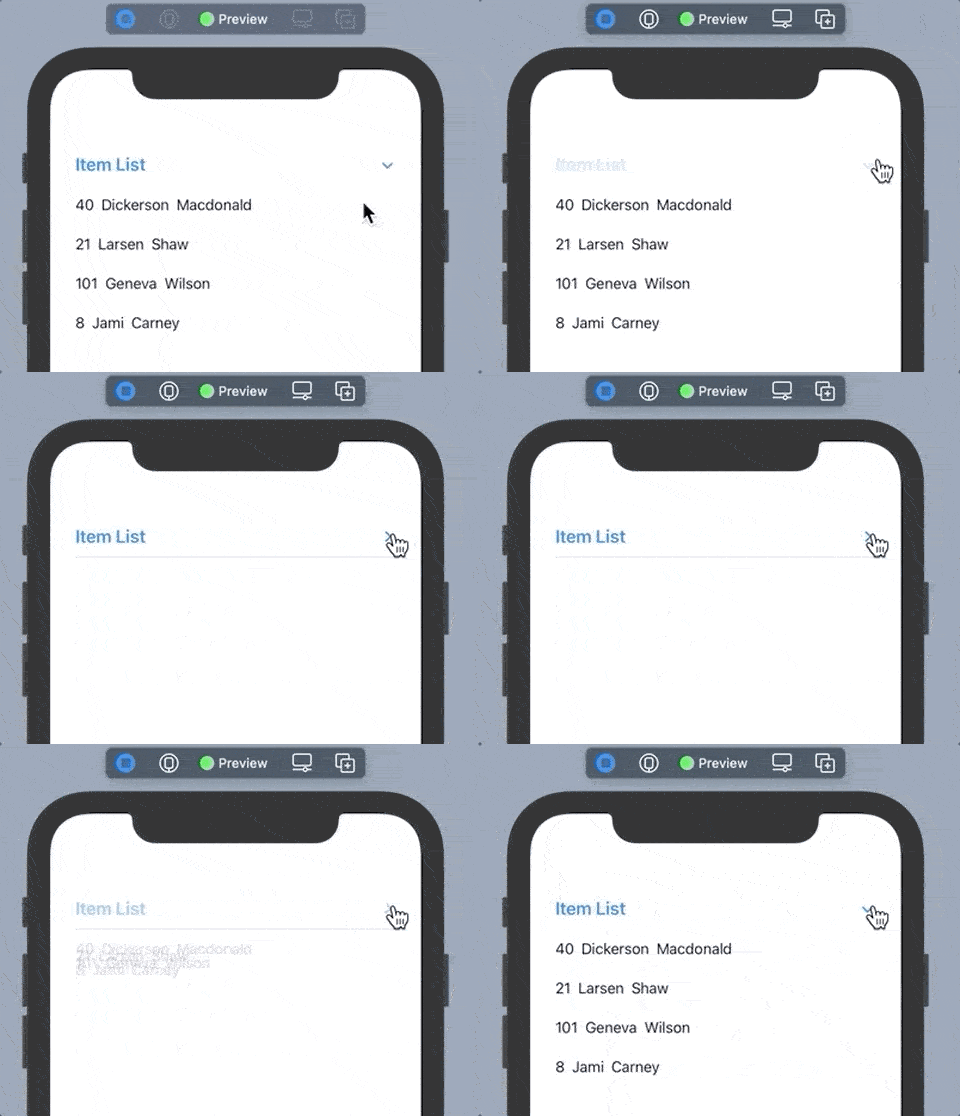
SidebarListStyle
セクションヘッダを使って、折りたたみ可能になる
まとめ
大きな変化があるのは、SidebarListStyleくらいですが、デスクトップのように使える領域が潤沢ではないので、些細なスタイルの違いが重要になってくる局面も多そうな気がします。
なお、ListStyleとして定義されている以下についてはiOSでは動作しないため、今回の検証からは除外しています。
- CarouselListStyle
- EllipticalListStyle
